How to Take Beautiful Sunburst Photos
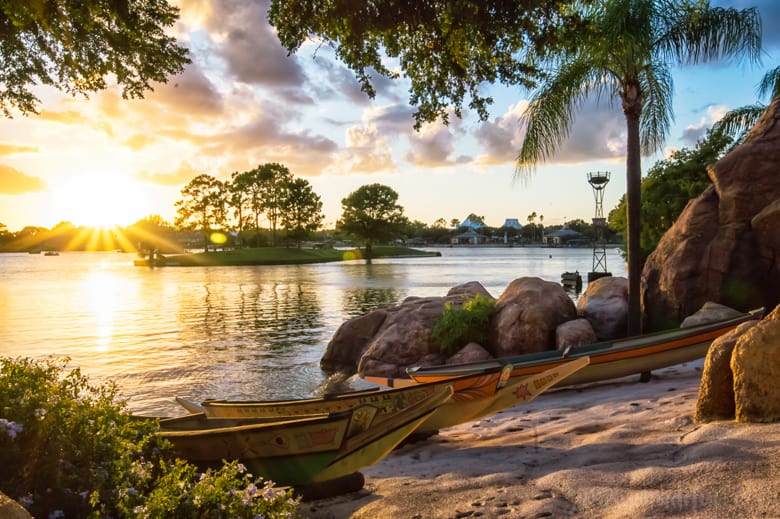
When we were at Disney World last I was really hoping to catch some amazing sunset photos, because there is just something amazing about the sunsets in Florida. Maybe it’s because I’m seeing them at the most magical place on earth, or maybe it’s because I take the time to soak them in while there, but I fall in love every time. The sunsets at Disney always have the most beautiful and vibrant colors, but I just never knew how to capture them!
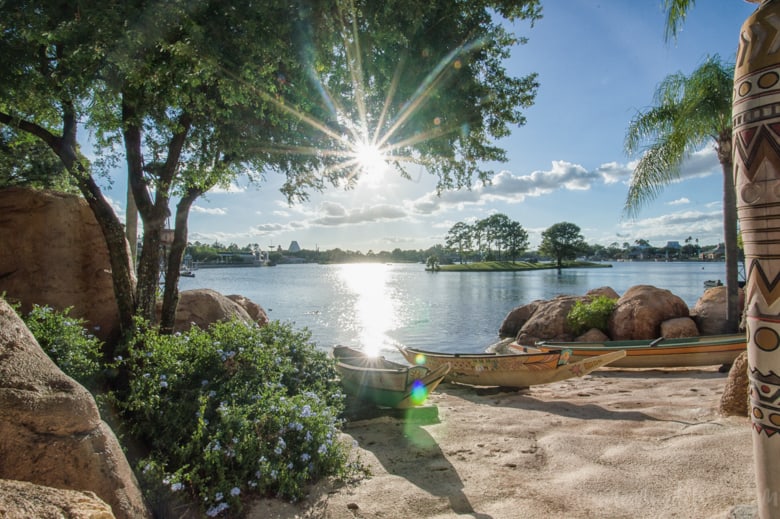
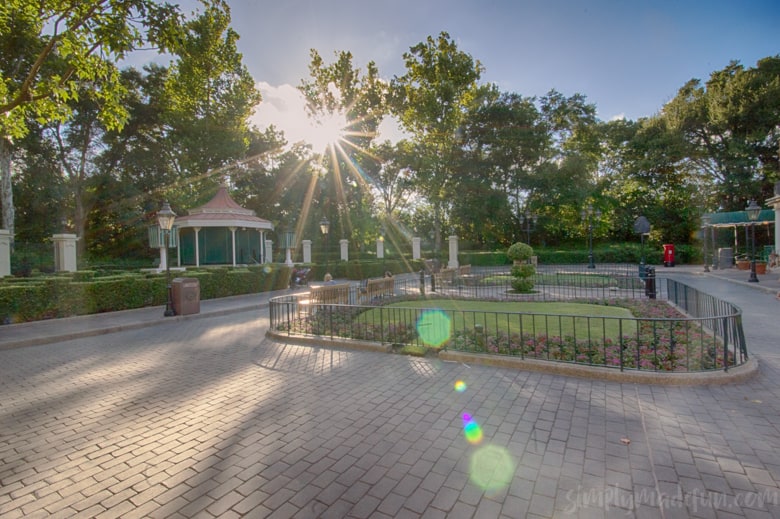
As I was walking through Epcot I decided to look up how to do it on my phone (thank you technology!) and discovered how simple it was. So I set off around World Showcase with my camera in hand to try to capture some fun pictures. And what I came away with were some phenomenally beautiful sunburst photos!
Every day at Disney is different, and on this particular day there were loads of clouds in the sky even though the sun was shining brightly. I always love cloudy skies when taking photos because I feel like it ups the visual interest of the photos. Plus, they’re fun to play around with as the sun peeks out from behind them.
But you don’t always need clouds to capture the perfect sunburst. You can use trees, buildings, or anything else that you have around you! The sky is the limit when it comes to this stuff. All it takes is a little know-how and a bit of practice and you’ll be capturing unique and gorgeous photos in no time!
When we were at the parks I decided to rent two camera lenses: a Nikon 10-24mm and a Sigma 50-100mm lens. For these photos I used the Nikon lens and loved it. Actually, I think I kept that lens on for most of the trip. It is by far my favorite lens that I have rented up to this point.
This post contains affiliate links. I may earn commission from qualifying purchases at no additional cost to you. I will never recommend a product I don’t use or trust.
To create sunburst photos you need a few things:
- Killer sunlight (usually best in the early morning or late afternoon)
- A lens with an aperture of 11, 16, or 22 (more on that later)
- A UV filter
- A wide angle lens (I used the 10-24mm each time!)
I took all of my sunburst photos in the late afternoon (just before sunset) to start out with. Chris and I don’t normally get up early enough to get to the parks first thing for sunrise sunburst photos, and the one day we did they were doing work on Cinderella’s Castle so I couldn’t get the photo I wanted (I was majorly bummed).
I started chasing the sun about an hour and a half before sunset that day. I decided that I wanted more than enough time to get the images I was hoping for and didn’t want to feel rushed in any way.
How to shoot sun flares and starburst photos:
For the best results you’ll want to use a DSLR camera, though a point and shoot can also get you good results with a bit of practice. However, with a DSLR you can use interchangeable lenses and are able to adjust the aperture (both things needed for successful sunburst photos). I also highly suggest putting a UV filter on whatever lens you’re using because you will be shooting into the sun and you want to protect that expensive lens you have!
Another thing you can use is a tripod to help with stability, but I didn’t use mine because it was still very bright out and my shutter speed was high enough to rule out blurriness from shaky hands.
If you don’t know how aperture and depth of field are related , you need to read this post! The two are essential for great starburst photos!
For sunburst photos you need a very narrow aperture and a wide focal length. I typically went with an aperture of f/22 for each of my photos because the larger the aperture you use means that the area the light passes through the opening is very small. The smaller opening causes the light to bend and will give your light source a starburst shape once it is recorded in the camera’s sensor. If a large starburst is what you’re after you should use a wide aperture like I did, but if you want something smaller you can lower your aperture to f/16 or f/11!
If you’re not comfortable shooting solely in manual mode, go ahead and put your camera in Aperture Priority Mode. This mode allows you to pick the aperture you want to shoot at while also picking the shutter speed for you so you don’t have to worry about it!
Read more about understanding aperture.
For sunburst photos you must put your ISO at either 100 or 200. Setting it so low will ensure that you have little to no noise like you would at a higher ISO value.
I also changed the white balance on my camera from AUTO (which I probably shouldn’t have it on that anyway) to SHADE. This greatly helped me to get my white balance right in-camera instead of having to majorly fix it in post-processing!
So to recap:
Camera Mode: Aperture Priority Mode
Aperture: f/22
ISO: 100 or 200
Shutter speed: determined by the camera when using Aperture Priority Mode
Your next step after getting your camera all set up is to get out there and start shooting! Find some buildings or some trees for the sun to peek out from behind and try capturing the perfect sunburst photos. It may take a bit of practice to get the right combination of camera settings and photo composition but once you do you will become obsessed with how your photos turn out! I know I can’t wait to go back to Disney and play around with starbursts even more.


