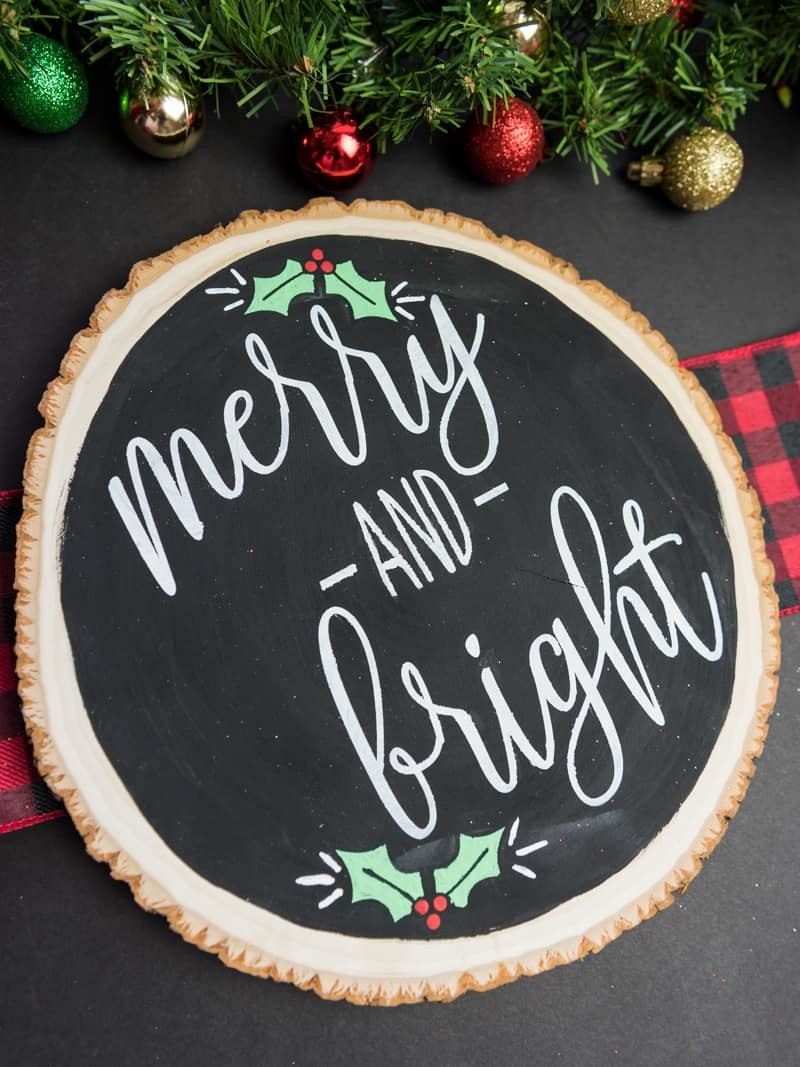
Reversible Merry and Bright Christmas Sign
Switch quickly and easily between Thanksgiving and Christmas decor with this reversible merry and bright Christmas sign!
Reversible signs are so in this year.
Who knew though? Seriously, because I didn’t.
I had been planning on making a wooden Christmas sign, and when the whole family came down with the stomach bug this week I had the perfect excuse to get crafting. But I couldn’t go anywhere because well, the stomach bug…..so I had to figure out how to make a wooden sign without any wood. Then, as I was pulling out our holiday decor I found my thankful chalkboard from last year and thought it just made sense to do a Christmas design on the back.
After a quick Pinterest search for sign inspiration I realized that pretty much everyone was doing these reversible signs, so at least I’m on the right track with this idea! I love it because it saves room, saves money on supplies, AND I don’t have to change out a bunch of decor with each season. It’s all about simplifying and saving room, which is perfect for the minimalist at heart (or at least those of us who are attempting to be one!).
The best part about this merry and bright Christmas sign is that it’s a little bit rustic and a whole lot of hand drawn elements. I did make mine with a premium font but you can get a really similar effect when you use the Magnolia Sky font from dafont.com.
This project is
- simple
- minimalist
- quick (perfect for a nap time project!), and
- customizable
This post contains affiliate links. I may earn commission from qualifying purchases at no additional cost to you. I will never recommend a product I don’t use or trust.
How to make your own reversible Merry and Bright Christmas sign!
You’ll Need
- A used piece of wood (mine is from this project)
- Acrylic Paint (multiple colors!) + Paint Brushes
- Mod Podge (optional)
- Braveheart font from The Hungry Jpeg (or the free file if you don’t want to make your own!)
- Stencil Vinyl
- Transfer Tape
- Silhouette Cameo or Cricut Machine
→ → → Download the CUT files here ← ← ←
How to
+ Pull up the design in your software and send it to your cutting machine (make sure you have the settings on your machine set for stencil material!)
+ Paint your wood slice (I chose black) and set it aside to let it dry.
+ While it’s drying weed your design and then use the transfer tape to pick up the design off the vinyl backing.
+ Once your wood slice is dry transfer your stencil onto it and pull up the transfer tape.
+ This step is optional but you could (and I wish I had) paint mod podge on top of your stencil so that the paint won’t bleed underneath. I always suggest this because it helps get clean lines and….of course….I forgot this time.
+ Now it’s time to paint your design! Do a light coat of paint (don’t overdo it!) and peel up your stencil when it’s still somewhat wet (I usually do it when the paint is tacky).
+ If your paint has bleed through a bit now is the time to do some touch-ups. You could also sand it a bit to give it a more rustic look!
This reversible merry and bright Christmas sign is one of my favorites, and is such a simple holiday design! I actually think it would look really cool on top of big fluffy holiday wreath hanging on my front door. Or on a mantle! Too many possibilities, how will I decide?
Since I love minimalist Christmas decor, check out some of my favorites from years past.
Now all I’ve got to do is figure out the perfect place to display this merry and bright Christmas sign!
more holiday fun!
[pt_view id=”e6c5d75u73″]
and some blogger inspiration too!
[inlinkz_linkup id=751452 mode=1]






I love this sign! I might have to commission you to make me one for next Christmas haha!
hahaha I would LOVE to make you a sign! I still need to make a trip out to you so maybe we can do that and have a craft weekend.
Is that sign available for purchase?
It is not available for purchase! The file is a free download so that you can make your own if you wish though. ?